

IV Works
Year
2022
Model
- Av4
Build
- 1-2 hours
Evolve. Always.
Developed over 7 months to improve on all parts of the previous generation.

Directions
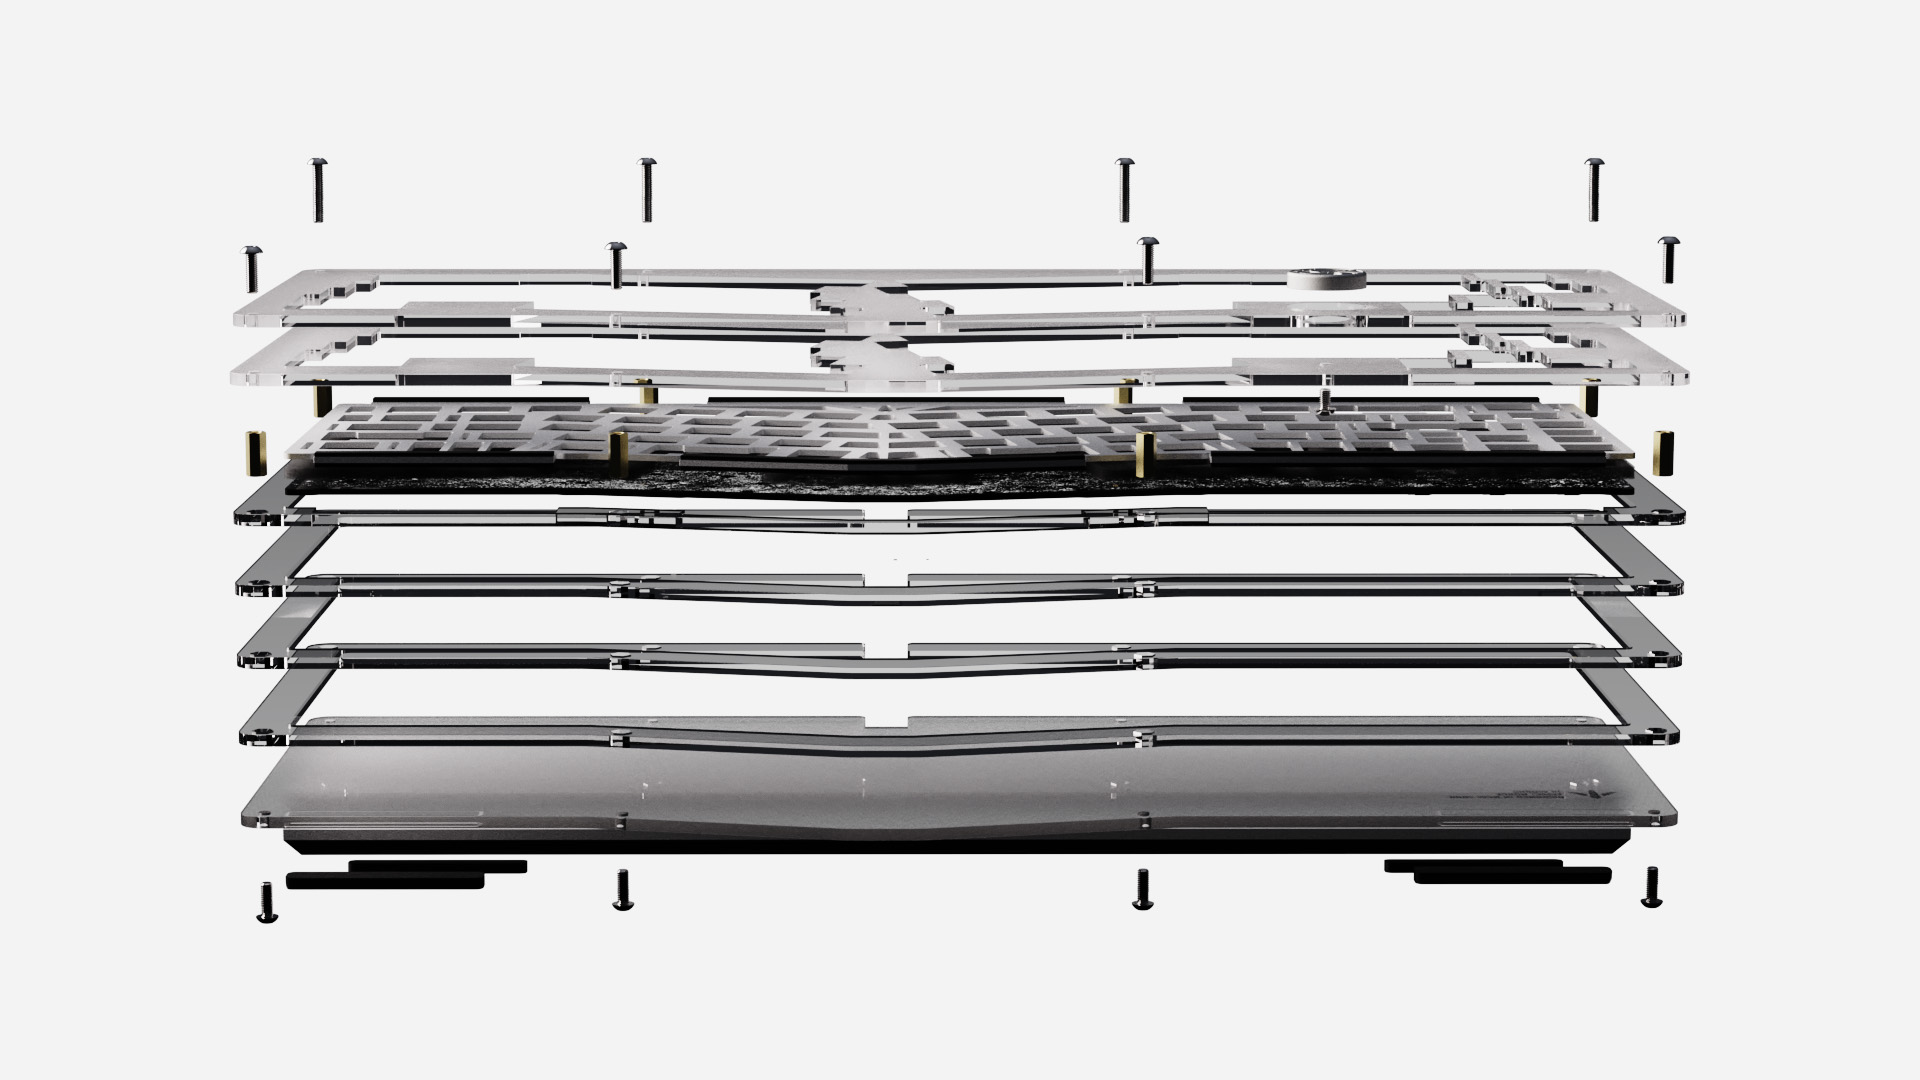
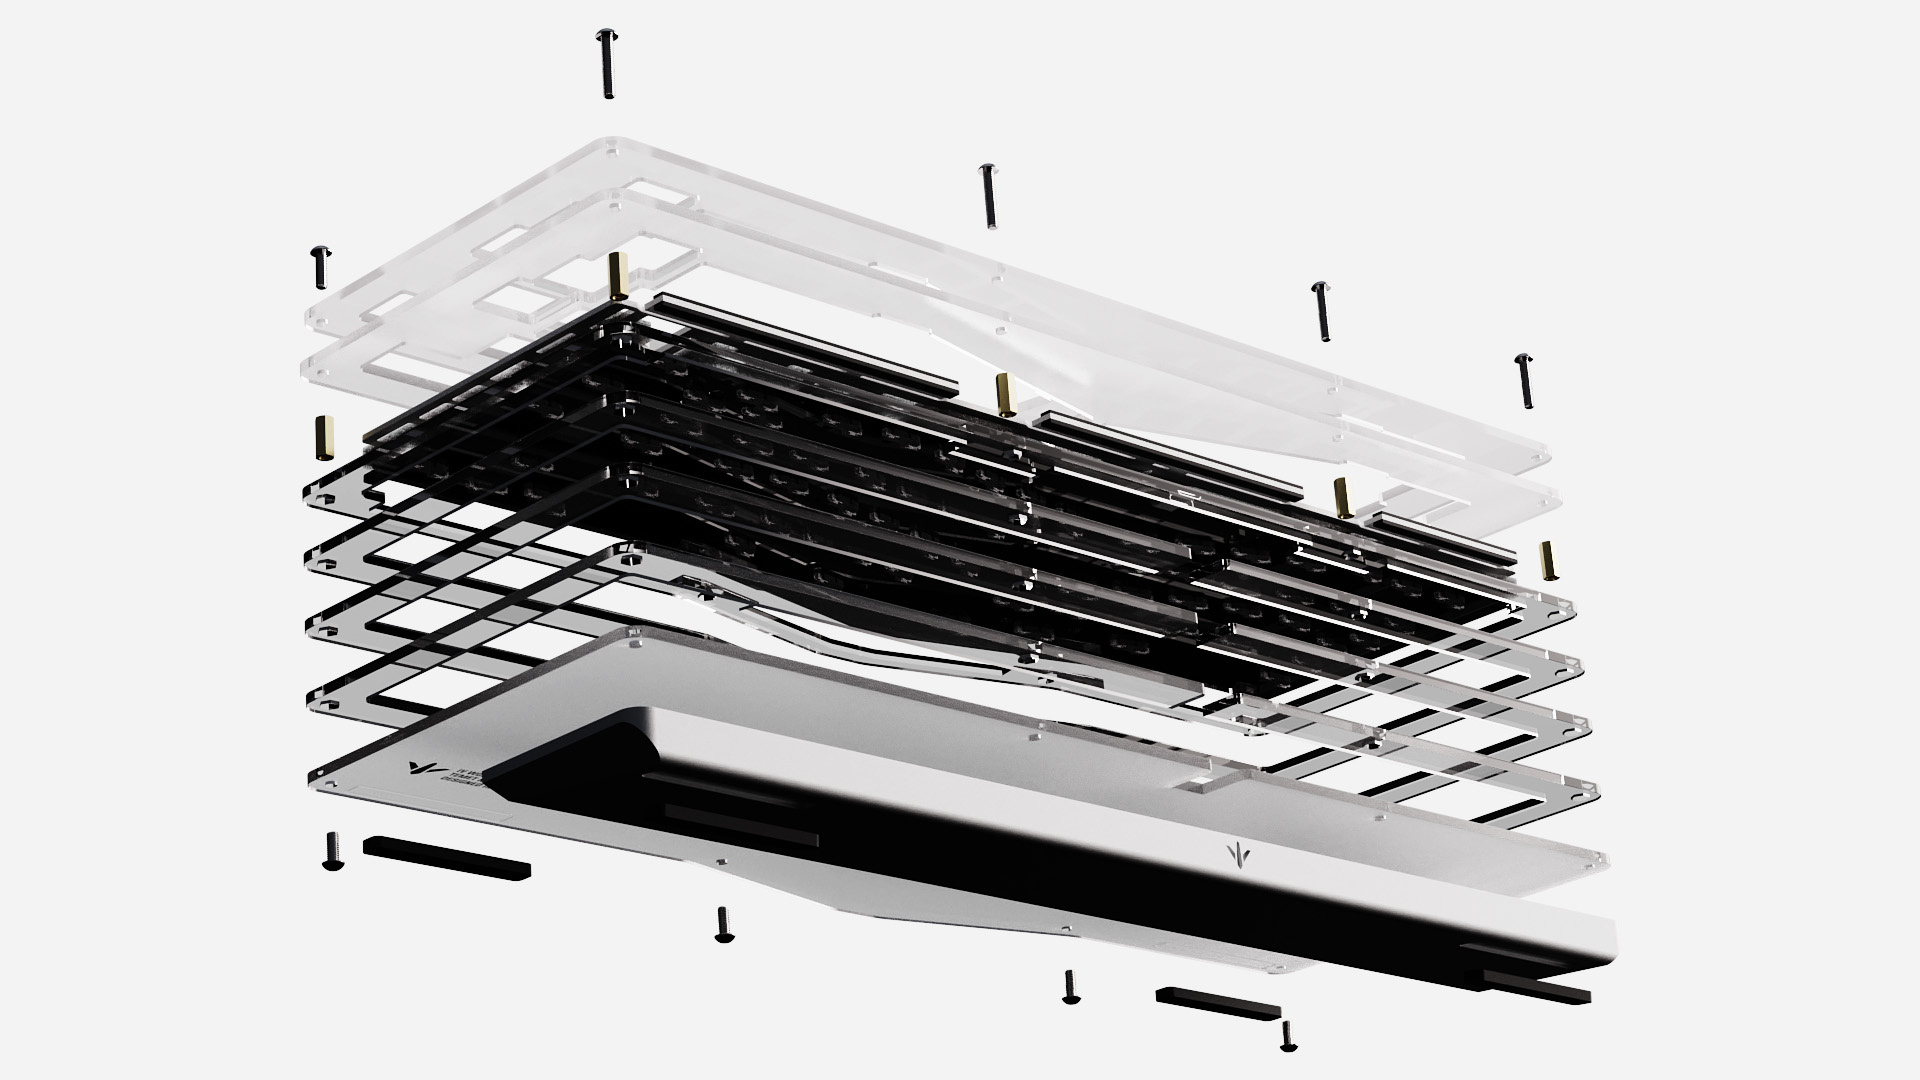
The Av4 was designed with tighter tolerances than previous models, leading to better fit and finish. This makes installing the standoff more challenging. Please take your time and be careful not to stress the layers. Replacement layers are available.
The case is made from seven layers of acrylic. The top layer is 1 and counts down to 7, at the bottom. Use the included Cotton Gloves and Microfiber Cloth to keep the keyboard clean.
I
- Install and remove the brass standoffs into each hole on layers 3, 4, and 5 (this removes any burrs left from cutting)
- Remove paper from acrylic
- Layers 4, 5, and 6 are identical
- Install the brass standoffs into layer 6
- Install layer 5 onto layer 6
- Repeat with layers 4 and 3
- Install layer 7 on the bottom of layer 6 by installing four small screws (8mm) on the bottom front
- If you are using the acrylic riser, stack the riser layers and install with four long screws (20mm)
II
- Plug a USB cable into the PCB
- Check all sockets on the PCB with precision tweezers or the ends of a paperclip
- If you have firmware issues, please see downloads
- Install stabilizers on top of PCB
- Install the foam on top of PCB
- Install the leaf-spring gaskets on both sides of the plate
- Install the plate on top of foam
- Install the switches being sure to support the back of the hotswap sockets
III
- Place the PCB stack into the top of case
- Align plate evenly on all four sides
- Install the badge on layer 2 with the smallest screw (4mm)
- Install layer 2 and 1 on top of the case
- Align edges of case
Acrylic Riser
- If you are using the acrylic riser install eight medium length screws (10mm)
- Install feet
Metal Riser
- If using metal riser install four medium length screws (10mm) on top front and four long screws (24mm) on top back till they reach the bottom of the brass standoffs
- Flip board 90° and align metal riser on bottom back of case
- Carefully screw the long screws through the case into the riser
- Install the feet
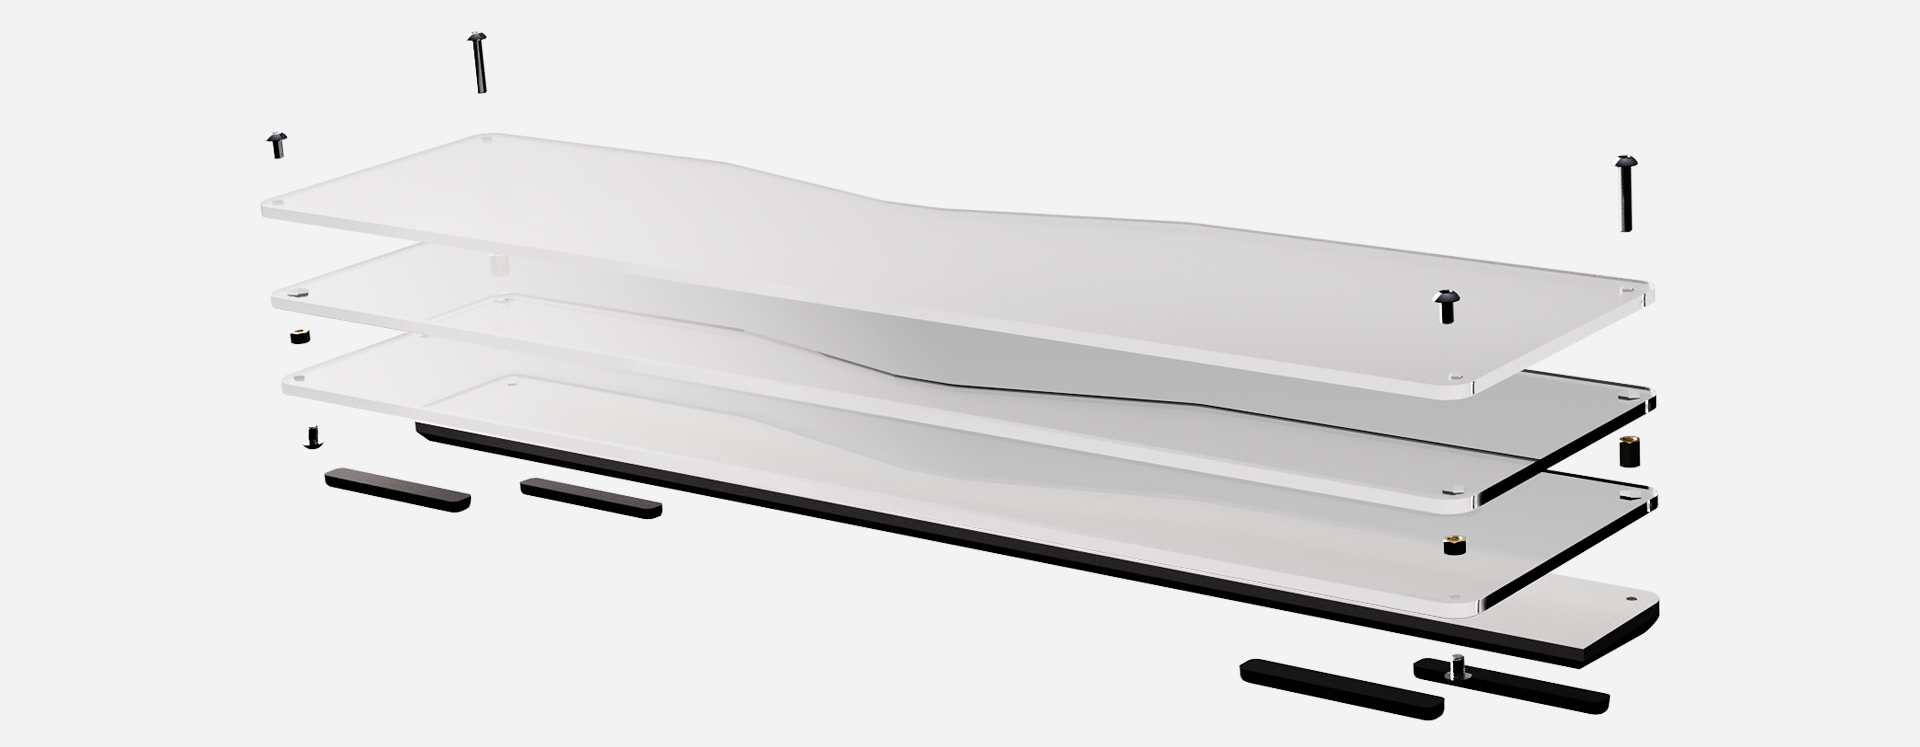
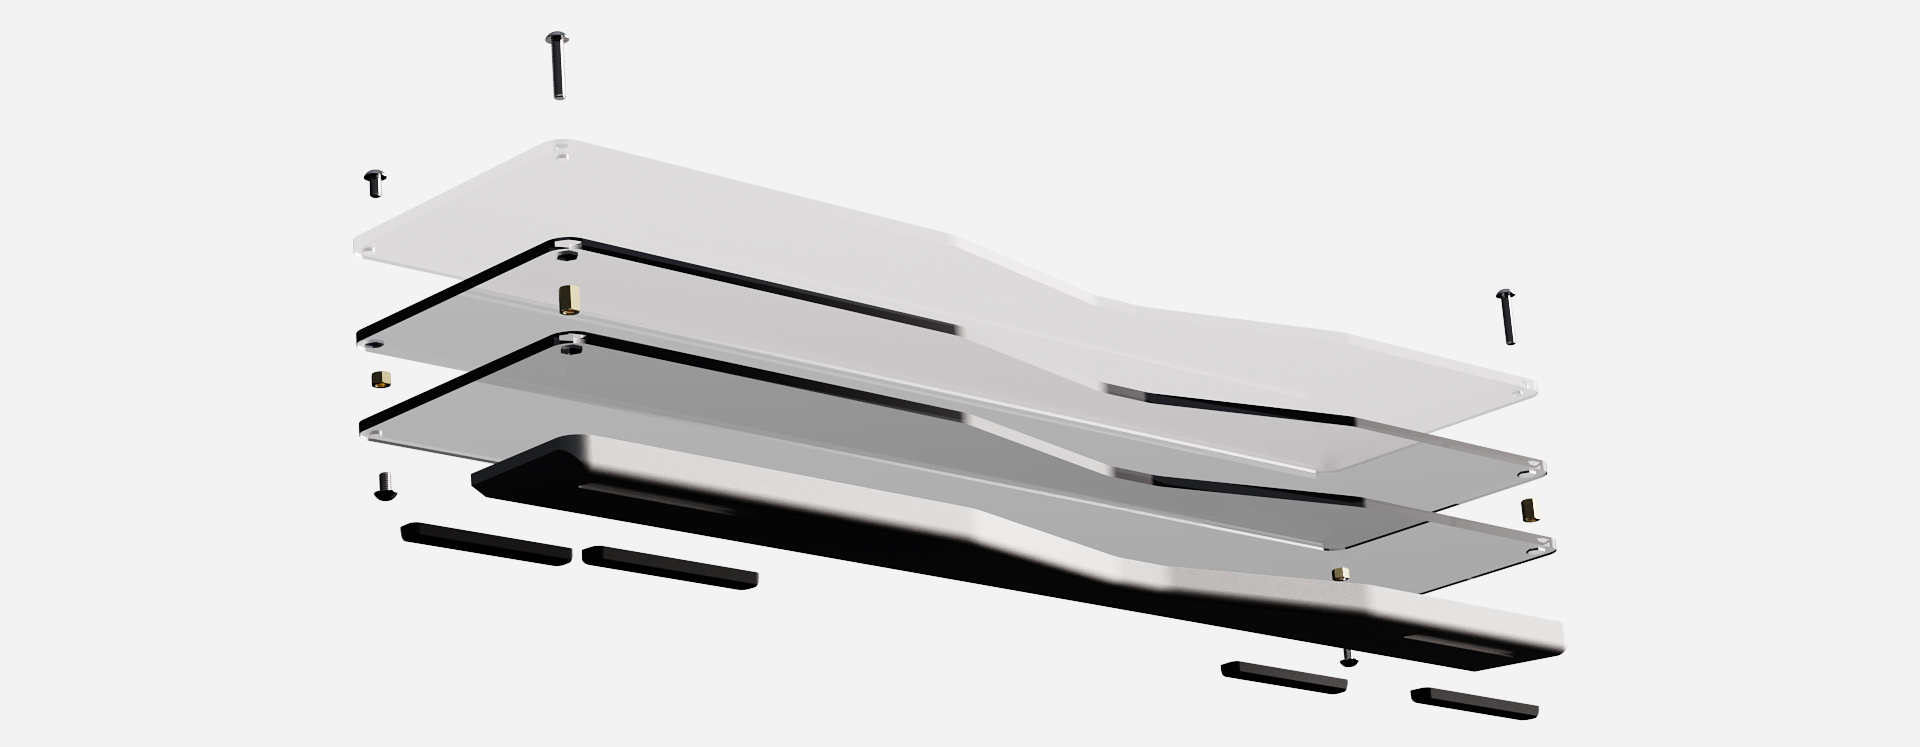
Wrist Rest
The matching Wrist Rest uses the same construction as the keyboard.
I
- Install and remove the brass standoffs into each hole on layers 2 and 3 (this removes any burrs left from cutting)
- Remove paper from acrylic
- Install the brass standoffs into layer 2 (clear layer) short standoffs on the front, long standoff on the back
- Place layer 3 on the bottom of layer 2
- Install 2 smallest screws (4mm) on bottom front
- Place layer 1 on top of layer 2
Acrylic Riser
- If using the acrylic riser, install four medium screws (5mm) on the top
- Then stack the riser layers and install with two long screws (12mm) on the bottom back
- Install feet
Metal Riser
- If using metal riser, install two medium screws (5mm) on the top front and install two long screws (12mm) on top back till they reach the bottom of the brass standoffs
- Flip board 90° and align metal riser on bottom back of wrist rest
- Carefully screw the long screws through the wrist rest into the riser
- Install the feet